from datasets import load_dataset
ds = load_dataset("biglam/brill_iconclass", split="train")
ds.features{'image': Image(mode=None, decode=True), 'label': List(Value('string'))}Open VLMs have become increasingly competitive with proprietary models but all models (including proprietary) can face challenges in adapting to specific domains like art history. Using Supervised Fine Tuning (SFT) can help improve a model’s performance on specialized tasks like this.
This is a fairly technical tutorial for developers, GLAM staff, DH researchers etc. comfortable with Python and machine learning concepts. I plan to write a post on why I think this kind of model is important for GLAM in a future post!
Recently, TRL a very popular library for training transformers models using a variety of training approaches added support for supervised fine tuning of VLMs! Combined with the recently released HF Jobs service we can use TRL to do SFT on a VLM with no local GPU setup required!
tl;dr in this post we see how we can train a small specialized VLM davanstrien/iconclass-vlm using the trl library + HF Jobs.
This is a model that given an image like this

Will return:
{"iconclass-codes": ["25H213", "25H216", "25I"]}Which translates too:
25H216: waterfall25H213: river25I “city-view, and landscape with man-made constructions”We can see the model isn’t perfect yet but that’s what the follow up post will dig into!
In this post, I’ll use the example of using SFT to train a model to generate Iconclass metadata for artworks.
The Iconclass system has a history reaching back into the 1940’s when Henri van de Waal began to develop ideas for a universal classification for the subject matter of works of art. 1
The Iconclass metadata system consists of a hierarchical structure of categories and subcategories, allowing for a detailed description of the content of artworks. The top level categories are:
0 · Abstract, Non-representational Art
1 · Religion and Magic
2 · Nature
3 · Human Being, Man in General
4 · Society, Civilization, Culture
5 · Abstract Ideas and Concepts
6 · History
7 · Bible
8 · Literature
9 · Classical Mythology and Ancient History
Within these are more specific subcategories that allow for even greater detail in the classification of artworks (you can find more detailed info on the system below)
Underneath each main category, there are numerous subcategories that further refine the classification.
For example under 3 (Human Being, Man in General), we find subcategories such as:

We then move down the hierarchy levels we see more specific subcategories:

As we move further “down” the hierarchy levels we see even more specific subcategories such as 31F12 (bones (symbol of Death) 🤘) 
This is the first in a two-part series on fine-tuning VLMs for specialized tasks. In this post, we’ll cover supervised fine-tuning (SFT). The next post will explore using GRPO (Group Relative Policy Optimization) to further improve model performance!
Now we have a better sense of the task we’ll go through the process of fine-tuning a VLM using TRL to generate Iconclass metadata for artworks.
The steps to train a VLM using SFT are very minimal when using TRL. To do SFT for a VLM model we need to have a dataset with images + labels (text) output.
For TRL, the main thing we need to take care of is finding or preparing a dataset in the right format.
Fortunately, there is already a dataset available on Hugging Face that contains images of artworks along with their corresponding Iconclass metadata.
The biglam/brill_iconclass dataset, which is part of the BigLAM organization on the Hub, consists of artworks from the Brill collection, each annotated with Iconclass codes. We can see a preview of this here:
We’ll need to do some work to get this dataset into the right format for training but this is fairly minimal.
We’ll start with loading the dataset and inspecting its current features.
from datasets import load_dataset

ds = load_dataset("biglam/brill_iconclass", split="train")
ds.features
{'image': Image(mode=None, decode=True), 'label': List(Value('string'))}We can see we currently have two columns (image column and text column) in our dataset. We can also take a quick look at the first row
ds[0]{'image': <PIL.JpegImagePlugin.JpegImageFile image mode=RGB size=390x500>,
'label': ['31A235', '31A24(+1)', '61B(+54)', '61B:31A2212(+1)', '61B:31D14']}We see that label consists of a list of iconclass codes. Let’s look at an example image:
ds[0]['image']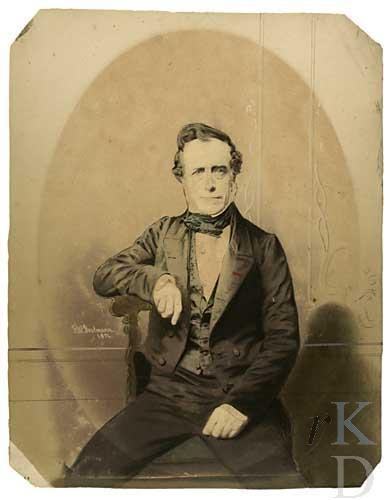
As we can see in the TRL docs for using TRL with VLMs we need a dataset with a column of images (formated as a list of images) and a column containing messages, i.e. something like this
image column: List[Image]
text scolumn: [
  {
    "content": [
      {
        "text": null,
        "type": "image"
      },
      {
        "text": "Please describe this artwork thoroughly.",
        "type": "text"
      }
    ],
    "role": "user"
  }
]
We’ll see how to format our dataset accordingly in the next section so this should become clearer!
For this particular dataset I double check that the images are RGB and not too big. This isn’t always required but since GLAM (Galleries, Libraries, Archives, and Museums) datasets can contain very large images/ a lot of black and white images, I do it here as an extra precaution!
def ensure_rgb(example):
    """Ensure image is RGB"""
    if example['image'].mode != 'RGB':
        example['image'] = example['image'].convert('RGB')
    return example

def ensure_size(example, max_size):
    """Resize to max_size on one edge keeping aspect ratio correct"""
    image = example['image']
    w, h = image.size
    if max(w, h) > max_size:
        scale = max_size / float(max(w, h))
        new_size = (int(w * scale), int(h * scale))
        image = image.resize(new_size, Image.LANCZOS)
    example['image'] = image
    return example

ds = ds.map(ensure_rgb, num_proc=4)
We need to convert our dataset to the messages format. We can do this using the datasets library’s map function to transform each example in the dataset. We’ll create a format_as_messages function to handle the conversion for each example.
In this particular example I want the VLM to output JSON containing a key iconclass-codes with a list/array of iconclass codes so we use json.dumps to format a dictionary into a JSON string we can include in the messages as the assistant’s response.
from typing import Dict, Any
import json


def format_as_messages(
    example: Dict[str, Any], prompt: str | None = None
) -> Dict[str, Any]:
    """Format single example into messages format for TRL."""
    if not prompt:
        prompt = "What is in this image?"
    labels = example["label"]
    response = {"iconclass-codes": labels}
    messages = [
        {
            "role": "user",
            "content": [
                {"type": "image"},
                {"type": "text", "text": prompt},
            ],
        },
        {
            "role": "assistant",
            "content": [{"type": "text", "text": json.dumps(response)}],
        },
    ]

    return {
        "images": [example["image"]],  # List with single image
        "messages": messages,
}It might seem a bit weird that we pass images to a list in this case but this is done so we can also support datasets where multiple images are included in a message(s).
We can now apply the format_as_messages function to our dataset using the map function. We’ll use a simple prompt for the VLM to follow.
ds = ds.map(
    format_as_messages,
    remove_columns=["image", "label"],
    num_proc=6,
    fn_kwargs={"prompt": "Extract ICONCLASS labels for this image."},
)
Let’s take a look at the dataset after formatting:
ds[0]{'images': [<PIL.JpegImagePlugin.JpegImageFile image mode=RGB size=390x500>],
'messages': [{'content': [{'text': None, 'type': 'image'},
{'text': 'Extract ICONCLASS labels for this image.', 'type': 'text'}],
'role': 'user'},
{'content': [{'text': '{"iconclass-codes": ["31A235", "31A24(+1)", "61B(+54)", "61B:31A2212(+1)", "61B:31D14"]}',
'type': 'text'}],
'role': 'assistant'}]}We now split the dataset into train, validation, and test sets. For reasons that will become clearer in a future blog post we actually want to keep quite a bit of data back for later work so we’ll define these splits a bit more manually than usual!
from datasets import DatasetDict

# Step 1: Split off 5% for test
split = ds.train_test_split(test_size=0.05, seed=42)
train_valid = split["train"]
test_ds = split["test"]

# Step 2: Split the remaining 95% into train and valid
train_valid_split = train_valid.train_test_split(test_size=0.4737, seed=42)
train_ds = train_valid_split["train"]
valid_ds = train_valid_split["test"]

# Combine into a DatasetDict

ds = DatasetDict({"train": train_ds, "valid": valid_ds, "test": test_ds})dsDatasetDict({
train: Dataset({
features: ['images', 'messages'],
num_rows: 43870
})
valid: Dataset({
features: ['images', 'messages'],
num_rows: 39486
})
test: Dataset({
features: ['images', 'messages'],
num_rows: 4388
})
})We’ll now push the dataset to the Hugging Face Hub so that it’s easily accessible for others (and for us in the future!). We’ll first use flatten_indices since we did quite a few transformations on the dataset.
ds = ds.flatten_indices()
ds.push_to_hub("davanstrien/iconclass-vlm-sft")
CommitInfo(commit_url='https://huggingface.co/datasets/davanstrien/iconclass-vlm-sft/commit/d8d2cfe679ba89346920a894c8f7d134965a43a5', commit_message='Upload dataset', commit_description='', oid='d8d2cfe679ba89346920a894c8f7d134965a43a5', pr_url=None, repo_url=RepoUrl('https://huggingface.co/datasets/davanstrien/iconclass-vlm-sft', endpoint='https://huggingface.co', repo_type='dataset', repo_id='davanstrien/iconclass-vlm-sft'), pr_revision=None, pr_num=None)Hugging Face Jobs allows you to run code on Hugging Face Infrastructure including GPUs. Jobs can be run using either the huggingface_hub libraries CLI interface or via the Python API. A hello world example looks like this
!hf jobs run python:3.12 python -c "print('Hello world!')"Job started with ID: 68b86a53e824c700d00ad361
View at: https://huggingface.co/jobs/davanstrien/68b86a53e824c700d00ad361
Hello world!Jobs have an experimental uv run api that allow you to run uv scripts using Jobs. UV scripts are Python scripts that include their dependencies directly in the file using a special comment syntax. This makes them perfect for self-contained tasks that don’t require complex project setups. This works super well for use cases like a TRL training script!
Let’s take a look at the script we’ll be running.
With our dataset ready, we need a training script that can handle VLM fine-tuning. The beauty of TRL’s VLM support is that it makes this surprisingly straightforward - the same SFTTrainer that works for LLMs now handles vision-language models seamlessly.
The key differences from a standard LLM training script are minimal:
AutoModelForImageTextToText instead of the text-only variantimages column alongside messagesThat’s it! TRL handles all the complexity of multi-modal training under the hood. Let’s look at the script:
You can find the full version of the script we’re running in main.py but we can also see the most important parts below.
import torch
from datasets import load_dataset
from transformers import AutoModelForImageTextToText

from trl import (
    ModelConfig,
    ScriptArguments,
    SFTConfig,
    SFTTrainer,
    TrlParser,
    get_kbit_device_map,
    get_peft_config,
    get_quantization_config,
)


if __name__ == "__main__":
    parser = TrlParser((ScriptArguments, SFTConfig, ModelConfig))
    script_args, training_args, model_args = parser.parse_args_and_config()
    training_args.gradient_checkpointing_kwargs = dict(use_reentrant=False)
    training_args.max_length = None

    ################
    # Model, Tokenizer & Processor
    ################
    torch_dtype = (
        model_args.torch_dtype if model_args.torch_dtype in ["auto", None] else getattr(torch, model_args.torch_dtype)
    )
    quantization_config = get_quantization_config(model_args)
    model_kwargs = dict(
        revision=model_args.model_revision,
        attn_implementation=model_args.attn_implementation,
        torch_dtype=torch_dtype,
        device_map=get_kbit_device_map() if quantization_config is not None else None,
        quantization_config=quantization_config,
    )

    model = AutoModelForImageTextToText.from_pretrained(
        model_args.model_name_or_path, trust_remote_code=model_args.trust_remote_code, **model_kwargs
    )

    ################
    # Dataset
    ################
    dataset = load_dataset(script_args.dataset_name, name=script_args.dataset_config)

    ################
    # Training
    ################
    trainer = SFTTrainer(
        model=model,
        args=training_args,
        train_dataset=dataset[script_args.dataset_train_split],
        eval_dataset=dataset[script_args.dataset_test_split] if training_args.eval_strategy != "no" else None,
        peft_config=get_peft_config(model_args),
    )

    trainer.train()

    # Save and push to hub
    trainer.save_model(training_args.output_dir)
    if training_args.push_to_hub:
trainer.push_to_hub(dataset_name=script_args.dataset_name)Let’s break down the important parts:
TRL’s argument parsing: The TrlParser handles all configuration - model settings, training hyperparameters, and dataset paths. This gives us a production-ready CLI interface for free.
Model loading for VLMs:
model = AutoModelForImageTextToText.from_pretrained(...)This automatically loads the right architecture for vision-language models. It handles models like Qwen2.5-VL, SmolVLM2, and others that support image+text inputs.
Quantization support: The script includes optional quantization (get_quantization_config) for running larger models on smaller GPUs. Perfect for experiments before scaling up.
Dataset handling: Notice how simple the dataset loading is - just point to your Hub dataset with the formatted images and messages columns.
The SFTTrainer: The same trainer used for text models now handles VLMs. No special configuration needed - it detects the multi-modal dataset and adjusts accordingly.
The script is designed to be flexible - you can run it locally for testing or scale to A100s on HF Jobs just by changing the hardware configuration.
The training script includes inline script metadata that tells uv which dependencies to install. This makes the script completely self-contained:
# /// script
# dependencies = [
#     "trl",
#     "Pillow>=9.4.0",
# ]
# ///
With this metadata, uv run automatically installs the exact dependencies needed before running the script - no virtual environment setup or requirements.txt needed! This is what makes HF Jobs + UV so powerful: your training environment is fully reproducible with zero manual setup.
When submitting to HF Jobs, you can also specify additional dependencies at runtime (like we do with tensorboard, wandb, etc.). This is useful for optional integrations that not everyone needs.
We can use the huggingface_hub library to easily manage and run our jobs on the Hugging Face platform. We’ll grab our Hugging Face token from an .env file using python-dotenv. If you are running this notebook somewhere else you could also set the HF_TOKEN environment variable manually.
from dotenv import load_dotenv
import os

load_dotenv()

HF_TOKEN = os.getenv("HF_TOKEN")
assert HF_TOKEN
We then create a new HfApi instance.
from huggingface_hub import HfApi

api = HfApi(token=HF_TOKEN)The easiest way to know the options our script supports would be to check the script but if we wanted we could also use hf jobs to print out the --help for the script. We can do this using the uv run subcommand:
!hf jobs uv run "https://gist.githubusercontent.com/davanstrien/26a301d5a810746128a27b8ae49d0950/raw/141883e6ba4f5b51bc22de49e761a03564364fc5/main.py" --helpIf you run this you’ll see uv installing the required dependencies for your script (in this case trl + Pillow) and then returning the available options for the script.
Since we may want to change options later we’ll define some variables to hold our configuration.
The main ones to note are the dataset, model and output model which refer to the dataset we want to use for training, the pre-trained model we want to fine-tune, and the output repo on the Hub where we want to save our model checkpoints respectively.
DATASET = "davanstrien/iconclass-vlm-sft"
MODEL = "Qwen/Qwen2.5-VL-3B-Instruct"
MODEL = "HuggingFaceTB/SmolVLM2-2.2B-Instruct"
OUTPUT_MODEL = "davanstrien/iconclass-vlm"
# Training hyperparameters
BATCH_SIZE = 10
GRADIENT_ACCUMULATION = 8
MAX_STEPS = None  # Adjust for full training
LEARNING_RATE = "2e-5"
EPOCHS = 1
We can then create a list to hold our script arguments that will be passed to the trl SFT fine-tuning script.
# use epochs if MAX_STEPS is None
if MAX_STEPS is None:
    MAX_STEPS = EPOCHS * (len(ds["train"]) // BATCH_SIZE // GRADIENT_ACCUMULATION)

# Build the script arguments
script_args = [
    "--model_name_or_path",
    MODEL,
    "--dataset_name",
    DATASET,
    "--output_dir",
    "./iconclass-vlm-outputs",
    "--hub_model_id",
    OUTPUT_MODEL,
    "--push_to_hub",
    "--per_device_train_batch_size",
    str(BATCH_SIZE),
    "--gradient_accumulation_steps",
    str(GRADIENT_ACCUMULATION),
    "--max_steps",
    str(MAX_STEPS),
    "--torch_dtype",
    "bfloat16",
    "--logging_steps",
    "10",
    "--save_steps",
    "100",
    "--eval_steps",
    "100",
    "--warmup_ratio",
    "0.1",
    "--learning_rate",
    LEARNING_RATE,
    "--attn_implementation",
    "kernels-community/flash-attn",
]
We now have our arguments ready to be passed to the trl SFT fine-tuning script. To actually run the script we can use the run_uv_job method.
We’ll pass a few things to this.
script: the URL or path to the trl SFT fine-tuning script.script_args: the arguments to pass to the script.dependencies: any additional dependencies required by the script.flavor: the type of hardware to use i.e. a100-largeimage: the docker image to use for the job.timeout: the maximum time to allow the job to run.env: any environment variables to set for the job.secrets: any secrets required by the job.TRACKIO_PROJECT="iconclass"
TRACKIO_SPACE_ID="trackio-trl"# Submit the job using run_uv_job
job = api.run_uv_job(
script="https://gist.githubusercontent.com/davanstrien/26a301d5a810746128a27b8ae49d0950/raw/141883e6ba4f5b51bc22de49e761a03564364fc5/main.py",
script_args=script_args,
dependencies=[
"torchvision",
"tensorboard",
"accelerate",
"wandb",
"kernels",
"trackio",
],
flavor="a100-large",
image="vllm/vllm-openai:latest",
timeout="12h", # Adjust based on MAX_STEPS
env={"TRACKIO_PROJECT": TRACKIO_PROJECT, "TRACKIO_SPACE_ID": TRACKIO_SPACE_ID},
secrets={
"HF_TOKEN": os.environ.get("HF_TOKEN"),
"WANDB_API_KEY": os.environ.get("WANDB_API_KEY"),
},
)/Users/davanstrien/Documents/daniel/blog/.venv/lib/python3.12/site-packages/huggingface_hub/utils/_experimental.py:60: UserWarning: 'HfApi.run_uv_job' is experimental and might be subject to breaking changes in the future without prior notice. You can disable this warning by setting `HF_HUB_DISABLE_EXPERIMENTAL_WARNING=1` as environment variable.
warnings.warn(We can now check the status of the Job.
job.statusJobStatus(stage='RUNNING', message=None)We can also get a URL to see the logs etc for the Job on the Hub.
job.url'https://huggingface.co/jobs/davanstrien/68b9c334d797b777b755e63b'After training completes, our fine-tuned model is automatically pushed to the Hub. But how well does it actually perform on generating Iconclass codes?
I’ve built an interactive viewer to explore the model’s predictions on the test set - you can compare the ground truth labels with what our fine-tuned model generates:
From exploring the predictions, a few patterns emerge:
This is a solid baseline from just one epoch of training! In the next post, we’ll see how GRPO can push performance further without needing any additional labeled data.
The fine-tuned model is available at davanstrien/iconclass-vlm if you want to experiment with it on your own art history images!
Interested in how the prediction viewer was built? I’ll cover that in a separate post about creating interactive model evaluation tools using vibe coding and the Hugging Face datasets viewer API!
We’ve successfully fine-tuned a vision-language model to generate specialized art history metadata - and the entire process required just a few steps:
uv run for cloud-based trainingThe combination of TRL’s VLM support and HF Jobs removes the traditional barriers to specialized model training. No local GPU setup, no complex multi-modal training code, no infrastructure management.
While our SFT model shows promising results, we can go further. In the next post, I’ll show how to use GRPO (Group Relative Policy Optimization) to further refine the model.
GRPO lets the model learn from its own predictions, and let’s us define more nuanced reward functions which could work very well for this kind of domain specific use case!
davanstrien/iconclass-vlmdavanstrien/iconclass-vlm-sftThis kind of approach could have many benefits for GLAM institutions and other specialist domains. As usual the main thing you need is to focus on the data! Creating and sharing a cool dataset is the first (and a very crucial) step towards building effective AI models for a new domain. Thanks to Etienne Posthumus for creating and sharing the initial dataset that made this project possible!